| Picaxe
Toothbrush Timer
|
|||
(click image for better view) Introduction: We purchased a Philips SoniCare toothbrush to help keep teeth clean. This electric toothbrush works well and comes with some whistles and bells. One of the features is a "quad-timer". This is a timer which beeps every 30 seconds for 2 minutes to tell you to brush different parts of your mouth. This is a simple feature, but it is a useful reminder for kids or anyone else who might skip on their commitment to oral care. Well, a beeping timer and flashing light is a perfect entry-level project, so we decided to build one as a learning experience. The result, several hours later, is a flashing, beeping, toothbrush timer, and a few more knowledgeable people. Here's how we built it.
Hardware, Parts, and Assembly The device performs the following features:
The parts used are as follows:
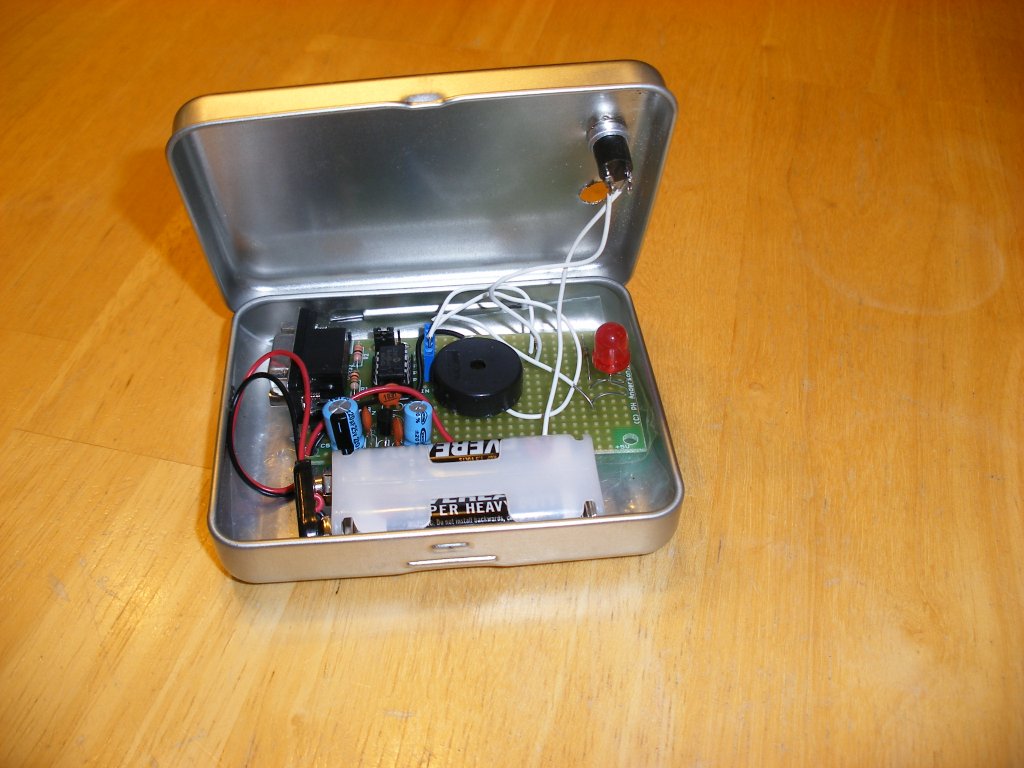
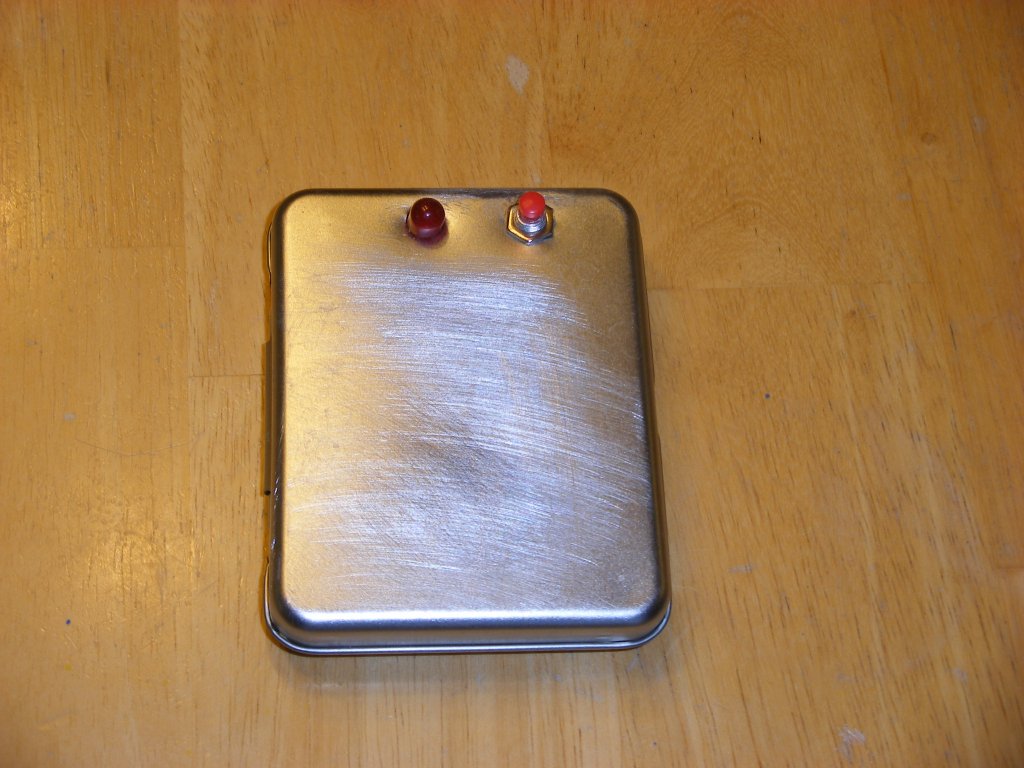
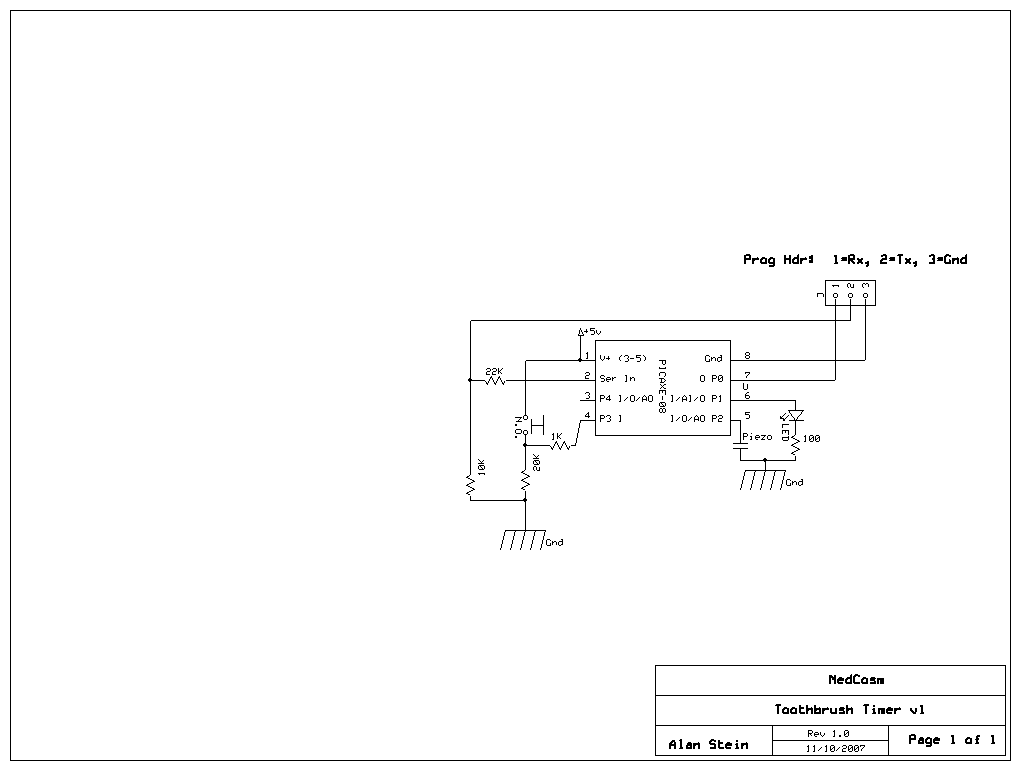
The parts are connected as depicted in this schematic. Instead of our normal construction route of soldering individual components from scratch on a piece of perfboard, we opted to use Peter Anderson's low cost ( < $10) prototype board. We simply added the piezo speaker, push-button, and an LED with dropping resistor. Because we wanted long-battery life, we did not solder in the power-on indicator LED since it draws about 20mA just to tell you the board is on. Also, we supply power from 2 AA batteries directly to the rails instead of using the 7805 linear regulator on the board. This means that you can't use anything greater than 5 volts for a power supply or you'll ruin the microcontroller, but since we are hardwiring our 3v supply(2 AA cells x 1.5 v each), it is just fine and it draws considerably less power (< 1mA at rest) meaning that a single set of batteries should supply power for years. We mounted the unit in a small stainless steel case from an old screwdriver set. The batteries fit inside. The pushbutton mounts through a hole in the case covered by a lock-nut. A piece of packing tape on the bottom of the prototype board insulates the circuit from the steel housing.
This program starts in a low-power loop checking to see if the pushbutton has been pressed. Once the button has been pressed, it beeps once and then flashes the LED at 1 second intervals. Every 30 seconds thereafter, it beeps to indicate that you should change the section of your mouth you are brushing. At the end, it plays a long low tone to indicate the end of the timing cycle and then goes into lower-power mode again. The heartbeat is created by flashing the LED for 1/10th of a second approximately every 15 seconds while it is checking to see if the button is pressed. This uses only a little power and is an indication of battery status, just like in a smoke detector.
Thoughts In building this project, there are few things worth noting: - The timer is in daily use and works well for its intended task. - Use aluminum or stainless. Bathrooms are wet steamy places and regular steel will rust pretty quickly.
Licensing and Disclaimers This code is explicitly released under the GPL. And this page is licensed under a Creative Commons Attribution 2.5 License. Write me if you find this project interesting. Link to this page if you find it relevant. Warning, if you need an electronic device for proper dental care then we don't want to know what your teeth look like. This project is provided without any warranty and probably isn't suitable for anything. Read or write a comment on the hardware projects Back to Picaxe Projects (and info about the Picaxe microcontroller) |