Here's
my take on a simple microcontroller driven autonomous robot. This
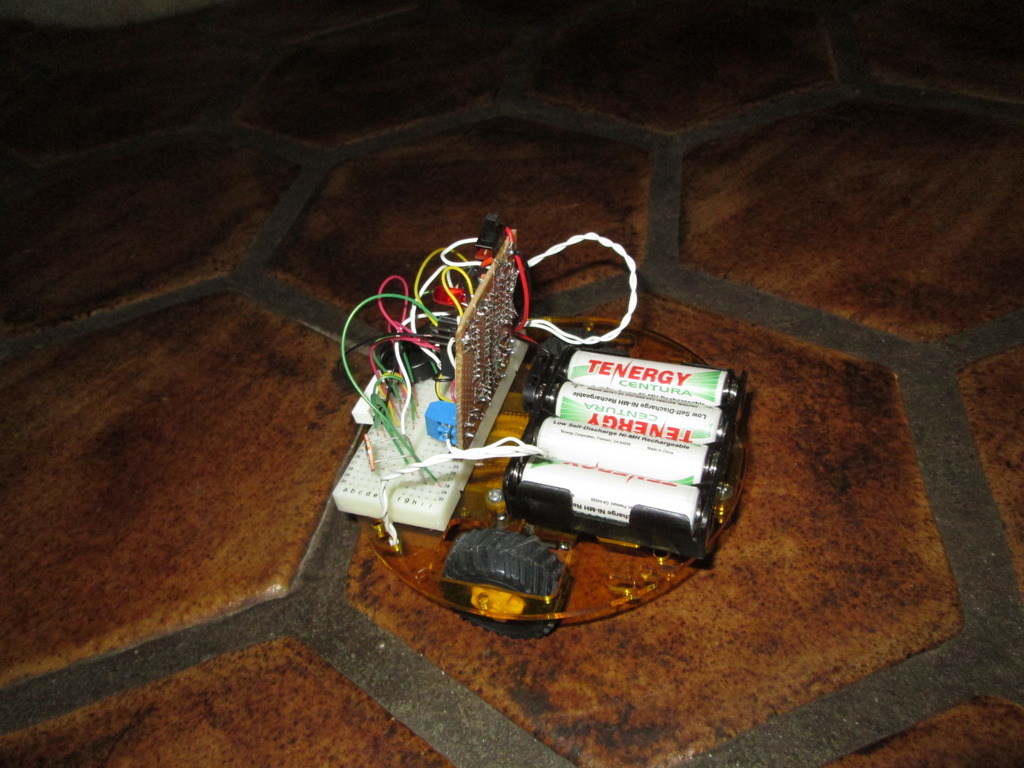
is semi-permanent build of the previous robots, driven by a more powerful PICAXE 20M2
microcontroller. The PICAXE and L293D motor controller are
mounted on veroboard (stripboard) with screw terminals for the motor
hookups. But because I always think that I might want to add just
1 more feature, I mounted the I/O devices (LDRs, LEDs, and piezo)
on solderless breadboard. In addition to allowing the addition of
new sensors, this also permits some flexibility in physical LDR
placement.
The whole build is pretty simple, but here are some misc comments and observations:
As with all my projects, the code identifies itself on power-up.
I used too small a piece of veroboard and almost
needed to mount components on top of each other. You know you're
too stingy on veroboard when you need to drill holes in the board
margin just to add a sliding power switch.
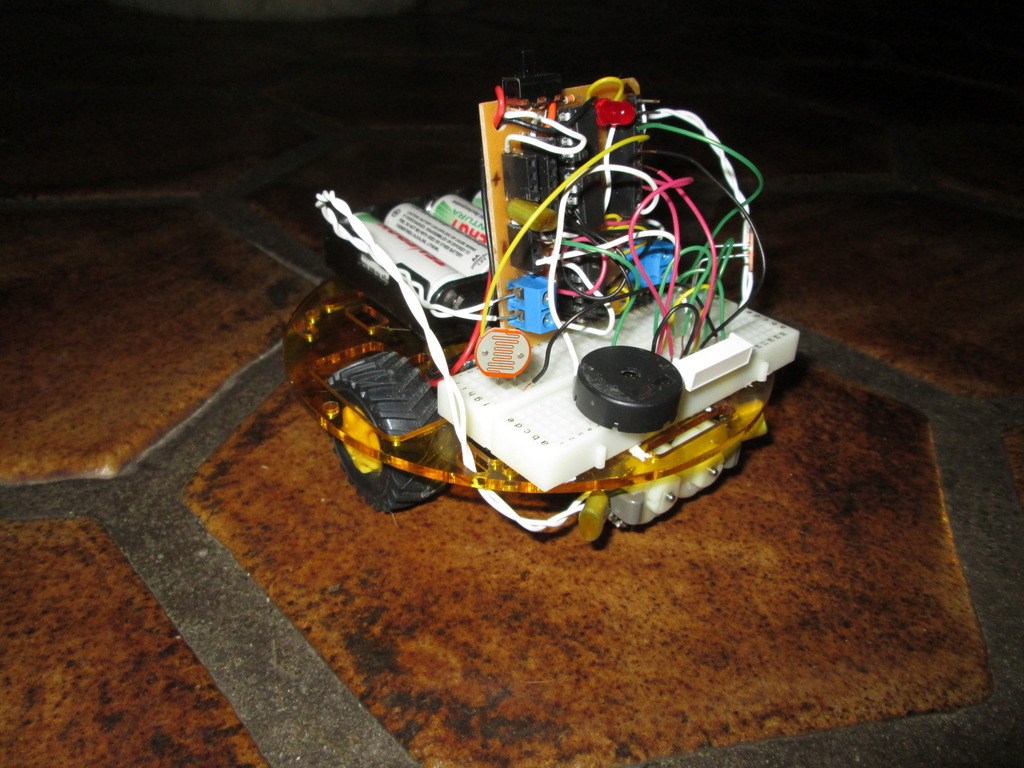
The veroboard is mechanically attached to the
solderless breadboard through a 4 pin header. This doesn't
provide any electrical connection, but is convenient for orienting the veroboard vertically.
This circuit needs a slide power switch because the
standby current of the L293D is substantial. A
FET to power the L293D under PICAXE control would have reduced power draw, but is overkill
for a toy.
Sharing
a single power supply between the
microcontroller and motors is, in my experience, always
problematic. Electrical noise can reset the microcontroller
randomly and lead to tricky debugging sessions. The L293D has
built in diode protection, and I've mounted caps across the motors, and
also across the supply for the PICAXE. This seems to filter the
supply voltage adequately. But reducing electrical noise takes a
bit of voodoo, so more filtering may be necessary with a different
build configuration.
The
M2 series can sense voltage. Upon
turning on, the robot indicates the battery charge by flashing the red
LED up to 6 times (6=max charge). btw, the red LED is mounted on
the serial line (port a.0) so it doesn't consume one of the 20M2's real
i/o output lines.
The motors are driven by a simple photophile (or
photovore) algorithm. When the light difference on the LDRs is
large enough, then the robot turns toward the light. As you can
see from the video below, it's pretty neat how 2 LDRs can provide some
semblance of object avoidance.
The 4 LEDs in the front play random patterns, or flash with the music.
The
robot will randomly stop and play any of about 20 different
tunes. If you're lucky enough to witness the Addams family tune,
then you'll see the robot dance.
Robotoy3 in action:
The electronics should drive almost any simple robot chassis. I had the
Pololu robot chassis and Tamiya twin-motor wheel assembly from a
previous version of this robot. The rear third wheel is a "ball
caster". All of these items are well made and compatible.
2 resistors (10K, and 22K; for in-circuit programming)
1 3-pin programming header
misc wire, DIP sockets, a battery holder, veroboard,
solderless breadboard
Pololu robot chassis rrc01a (transparent yellow)
Tamiya 70097 twin-motor gearbox kit
Tamiya 70101 truck tire set kit
Tamiya 70144 ball caster kit
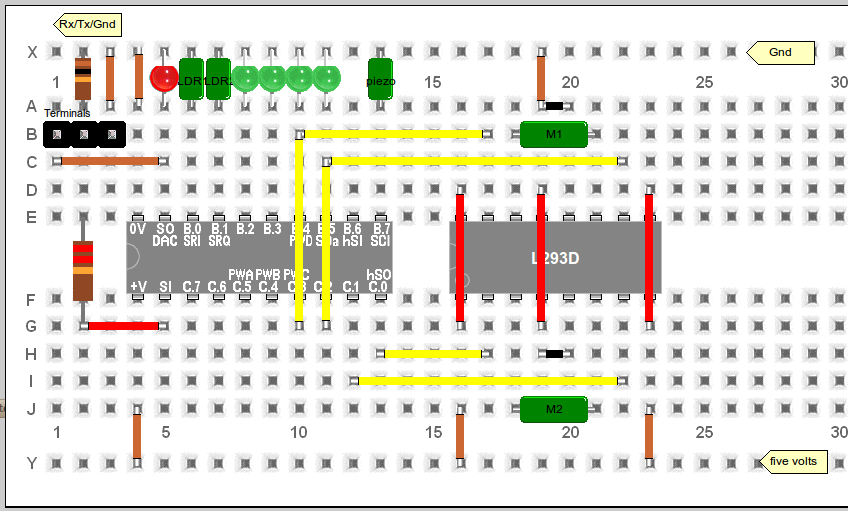
My schematic is above, and here is the
code.
My style/documentation is pretty rigorous, but I strongly advocate good
coding practice regardless
of the machine; all software only becomes more obfuscated over time.